Showing posts with label What's On the Plate?. Show all posts

Friday, April 20, 2012

Teriyaki Stir Fry - Meals Under 30 Minutes

Looks yummy doesn't it? Oh, it was!

I've never posted any recipes on here before and I'll admit that I really hate to cook. Between the planning ahead to make sure I have all of the ingredients, to the actual cooking and then finally to the table where my efforts are met with, "Ew, I don't want to eat that"; I'm just really not that enthused about it. But if my cooking effort takes less than 30 minutes, I'm a little more okay with it. Especially if I think it's tasty. The kids can have bread and water. :oP

In any event, when met with the usual burning question of, "what's for dinner?", I pulled out this recipe that I haven't made in ages and realized, I really need to bring it back into rotation! It's simple, it's fast and once you have the ingredients on hand, it's great to make in a pinch. And I love complete meals where I really don't have to make separate sides. Yay for less cooking!!

This recipe will make 4 servings. Or 2 jumbo sized ones if your kids are having bread and water.

Ingredients
  1. 2 tsp sesame oil
  2. 1 cup cooked chicken or beef (I cheat and buy the Safeway brand of plain cooked chicken in the meat dept, love it!!) I've also used the Costco canned chicken in this
  3. 10-16 oz stir-fry or Asian blend frozen veggies
  4. 1/4 cup teriyaki sauce
  5. 1 tb soy sauce
  6. 2 tsp rice vinegar
  7. 1/4 tsp garlic powder or 1 clove minced
  8. 1/2 tsp corn starch
  9. 2 tb water
  10. Toasted sesame seeds (optional)
  11. Jasmine rice or noodles
Steps
  1. If cooking rice, give it a 5 minute head start in the rice cooker. I usually make 1 cup precooked but if everyone wants rice, make 2.
  2. Heat sesame oil in a large nonstick skillet over medium-high heat. Add veggies and stir-fry for about 4 minutes, or until no longer frozen. In a bowl, mix teriyaki sauce, soy sauce, rice vinegar, garlic, corn starch and water. Add sauce and meat to veggies. Stir fry over high heat until sauce thickens.
  3. Serve over jasmine rice or noodles. Sprinkle with toasted sesame seeds if you so choose.
  4. Enjoy!
Bonus Recipe!
My quick version of Asian noodles:
  1. 5 oz angel hair pasta
  2. 1/2 cup sliced green onion
  3. 2 tb soy sauce
  4. 1/2 tsp sesame oil
Cook and drain the noodles and rinse in cold water. Add onions, soy sauce and sesame oil. Toss together. You can buy Asian noodles, but they can sometimes be expensive. You may also want to slowly add these ingredients in and taste throughout to suit you.

Yum!!

Thursday, October 28, 2010

How to Torture Fruit

I have a confession: I have only lukewarm feelings for Halloween. I don't mind the playful aspects of Halloween and good-natured parties, but I hate being scared, candy doesn't do much for me, and food that looks like dismembered body parts grosses me out. The only recipe I have on my blog that would be strictly for Halloween are these Vampire Cookies, but even those could double as a Twilight party treat.

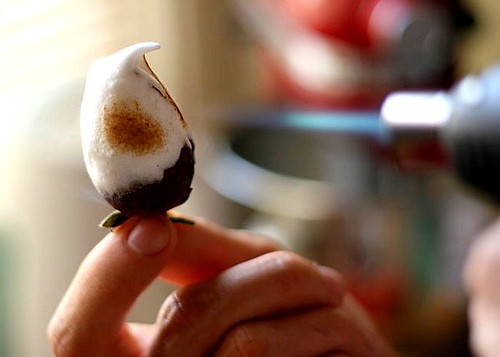
Even the recipe I'm posting right now could (and seasonally speaking, should) be done in the summer or spring -- if you decide that strawberries need to be tortured. You could also torture apple or pear slices this time of year.

How does one go about torturing innocent fruit? Well, let me show you. . .

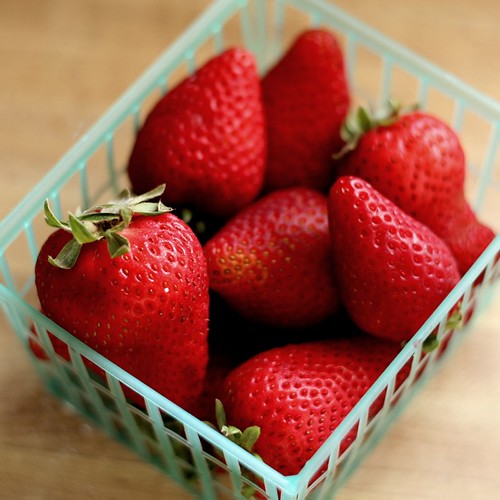
First you take some unsuspecting fruit, like strawberries.

10.18.10-143

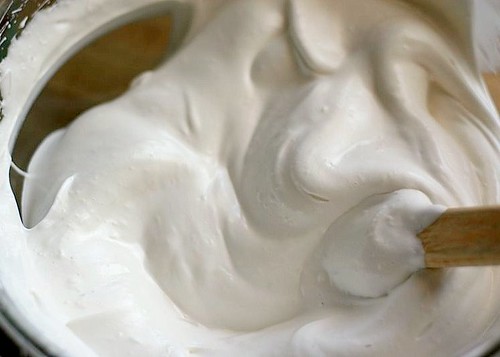
And a bowl of freshly marshmallow crème. It's a little known fact that fruit is deathly afraid of marshmallow crème. It's true.

10.18.10.10-29

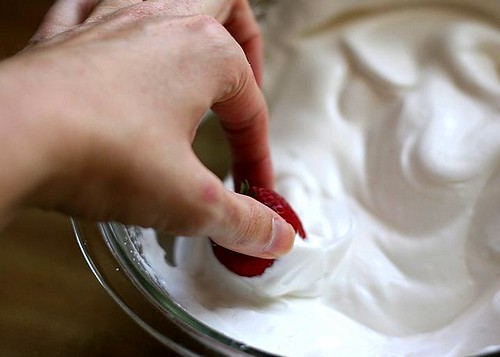
You can practically hear the poor thing screaming.

10.18.10-30

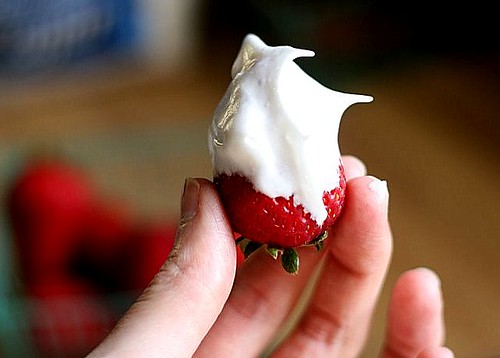
That looks mighty tasty, don't you think? 

Oh, we're not done. Not even close.

10.18.10-147

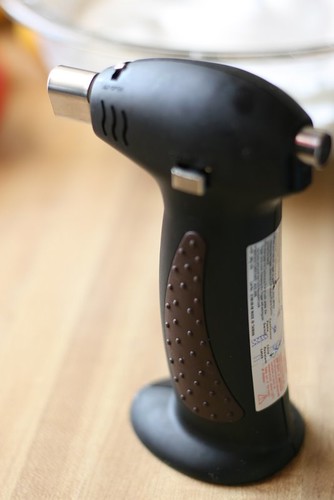
Enter (once again): kitchen torch. This thing has been earning its keep lately.

Kitchen Torch

Due to the fact that I was not blessed with an extra set of arms (like I believe all mothers should have during the first 2 years of their child's life), you'll have to use your imagination to understand how the crème turned golden brown. I think you'll manage.

10.18.10-31

I think this strawberry is ready to talk. 

What's that? You aren't. I think we can up the torture a few notches then.

10.18.10.10-39

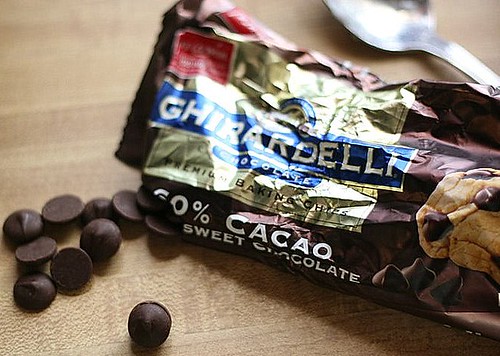
Chocolate.

10.18.10-36

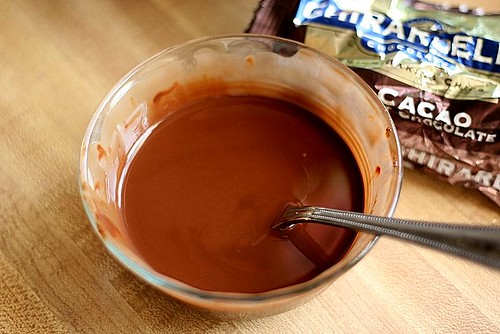
Chocolate + coconut oil = some mighty tasty fruit dip/homemade magic shell topping/a strawberry's worst nightmare.

10.18.10-37

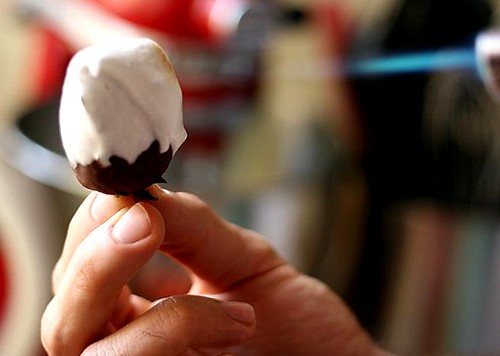
A dunk in that ought to do the trick.

10.18.10-40

Let them sit together in "ze coolah!" (bonus points for who can tell me what old show that came from) to commiserate their fates.

Next, a dip in the crème.

Re-enter: kitchen torch and an extra set of hands (thanks honey!)

10.18.10-48

I'm very serious about my methods of torture.

10.18.10-148

Is it torturing you as well? :)

10.18.10-31

Tortured Strawberries
aka Chocolate Covered (or not) Strawberries in Bruleed Marshmallow Crème
adapted from Furey and the Feast

2 egg whites

1/2 cup sugar
Pinch cream of tartar

1/2 teaspoon vanilla

Pinch salt

1 pound strawberries, rinsed and dried
1/2 recipe Homemade Magic Shell Topping (or a small bowl of melted chocolate chips)

Combine egg whites and sugar in a medium-sized bowl. Beat with an electric mixer until soft peaks form, about 3 to 4 minutes.
 Add in cream of tartar, vanilla and salt. Continue to beat on high speed for about a minute or so. Crème is done when it’s glossy and holding stiff peaks.


Dip strawberries into chocolate and place on a plate or tray covered in wax paper. Place in the freezer for about 5 minutes to set chocolate.

Dip and swirl each strawberry into crème. Using a blowtorch (or gas burner, if you are using skewers), brown crème as desired. Place on serving plate (or in mouth!) and serve immediately.

Nat's Notes:
1. These only keep for a short time. I made them once a couple of hours before I took them to a party and the crème had deflated somewhat.
2. This would also be good with apple or pear slices.


Print Recipe Text Only

Thursday, October 21, 2010

Grilled Malibu Chicken

We had a couple of 20-year-old guys over for dinner the other night. (Dark suits, black name tags, riding bikes, seen them around?) I like having them over because they're sweet. And easy to please. While we were eating, I asked them if they'd ever had Malibu Chicken.

10.10.04-18

"Yes, but not like THIS," one replied.

That was exactly my thought the first time I made this.

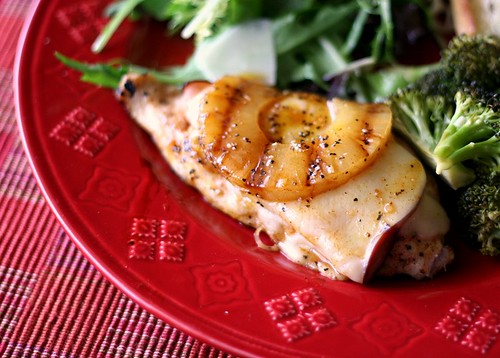
10.10.04-2Grilling this kind of chicken is unique, I think, but what makes it really special is the smoky-sweet sauce that gets spread all over it and between every layer (chicken, ham, cheese, and pineapple). The sauce is mostly butter and pineapple juice with some other things thrown in to make it pop. (Mine looks speckled because I accidentally put the grill seasoning in the sauce as well as the chicken. I didn't even realize that until just now. It tasted really peppery and a tad saltier than I remembered from the first time, but it was still really good. Oops.)

I found this recipe on Patio Daddio BBQ, one of the few manly food bloggers on Tasty Kitchen. This guy is a competitive BBQ'er. I, with my stove-top grill pan and fear of charcoal, am most definitely not. But I made it work. And I'm sure you can too.


Grilled Malibu Chicken
from Patio Daddio BBQ via Tasty Kitchen

6 boneless/skinless chicken breasts
2 T BBQ seasoning (I used Montreal Steak Seasoning)
12 slices deli ham (thin)
6 slices canned pineapple
6 slices Swiss cheese
1/2 cup pineapple juice (from the can)
4 T butter, melted
1 T plain yellow mustard
1 T honey
1 T molasses
2 tsp worcestershire sauce
1 tsp chili powder

(The original recipe suggested pounding the thicker parts of the breasts to make them more uniform in thickness, but I simply sliced through them horizontally to form two thin breasts out of each one. They cook faster this way, the meat goes farther, and it's more flavorful when you're using sauces or marinades.)

Season both sides of each breast with the BBQ seasoning, cover and refrigerate at least an hour.

Combine the butter, pineapple juice, mustard, honey, molasses, Worcestershire sauce and chili powder a medium mixing bowl and whisk until smooth, then set aside.

Prepare your grill for two-zone cooking (direct and indirect) at medium-high heat (about 400º). Or if that last sentence makes you panic, turn on your grill-pan to medium-high heat.

Quickly grill one side of each breast and each pineapple ring over direct heat until they are seared and have nice grill marks, about two minutes. Flip each breast and ring, brush with the sauce, and cook another two minutes.

Move the chicken to the indirect part of the grill (or a not-so-hot part of your pan) and brush the top of each with the sauce. Top each breast with two slices of ham and drizzle the ham with the sauce. Put a slice of cheese then a pineapple ring on each breast and drizzle yet again with the sauce. Continue cooking with the grill lid down (or in my case, a piece of aluminum foil. . . grill masters are rolling their eyes, I'm sure) until the internal temperature reaches 160º, about 10 minutes.

Serve with . . . another drizzle of sauce. Makes 6 servings.

Side Dish Suggestions: We ate this with a green salad, a lazy version of this roasted broccoli, and garlic bread. D-LISH.

Nat's Notes:
1. The first time I made this I used fresh pineapple. Instead of buying pineapple juice separately, I just pureed enough pineapple to make 1/2 cup for the sauce. It made it thicker, but still tasted great.

Print Recipe Text Only

Originally posted on Perrys' Plate

Thursday, October 14, 2010

Spiced Sweet Potato and Pecan Pancakes

I rarely repeat recipes several times, so the fact that I've made these multiple times says a lot about how much we've enjoyed these. Up until recently I had only used this recipe for waffles. I decided to try them as pancakes because we had company coming for breakfast -- I doubled the recipe and wanted them to be done quicker.

These pancakes (as well as the waffles) are slightly denser than regular pancakes, but not as much as you'd think. Whipping and then folding in the egg whites separately definitely lightens the texture, despite the use of whole wheat flour. (No one even noticed they were whole wheat! That's why I love whole wheat pastry flour.)  The batter is also laced with cardamom, which is a spice commonly used in Indian cooking and comparable to the cinnamon/clove/nutmeg flavor profile. But much more exotic tasting. If you don't have (or like) cardamom, simply substitute cinnamon.

These would be great as pumpkin pancakes, too. Just swap the sweet potato for pumpkin puree.

10.10.04.30-75

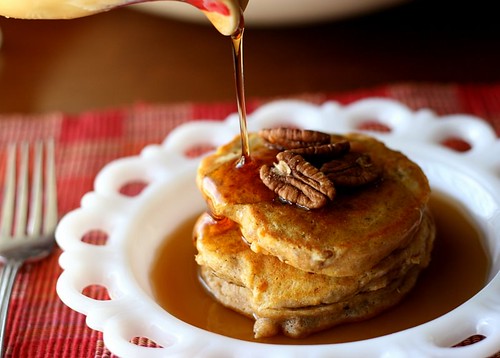
Why yes, I like my pancakes to float in maple syrup. Actually, I don't have a tripod and kept getting blurry photos, so I kept pouring syrup over these trying to get a more focused shot. I got my shot and my pancakes were soaked. Both missions accomplished.


Spiced Sweet Potato and Pecan Pancakes (or Waffles)
adapted from Taste of Home

1 cup whole wheat pastry or all-purpose flour
1/2 cup whole wheat flour
1 tablespoon sugar
1-½ teaspoons baking powder
1 teaspoon ground cardamom or cinnamon
½ teaspoon salt
3 eggs, separated
1 cup (8 ounces) sour cream
1 cup cold mashed sweet potatoes
½ cup milk
¼ cup butter, melted
¾ cup chopped pecans, optional
Maple syrup, optional

In a large bowl, combine the flour, sugar, baking powder, cardamom and salt. In another bowl, whisk the egg yolks, sour cream, sweet potatoes, milk and butter; stir into dry ingredients just until moistened. Fold in pecans, if using. In a small bowl, beat egg whites until stiff peaks form; fold gently into batter.

For pancakes, drop 1/4 cup-fulls of batter onto a greased skillet preheated to medium heat. Cook until bubbles begin to break the surface and the edges of the pancakes appear dry. Flip and cook until the other side is golden brown as well.  Serve with syrup. Yields about 14 pancakes.

For waffles, bake in a preheated waffle iron according to manufacturer's directions until golden brown. Serve with syrup. Yields 10 waffles or about 5 Belgian-style waffles.

Nat's Notes:
1. If you don't have (or like) cardamom, simply substitute cinnamon.

2. Pumpkin puree would also work well in place of the sweet potato.

Print Recipe Text Only

Originally posted on Perrys' Plate

Thursday, October 7, 2010

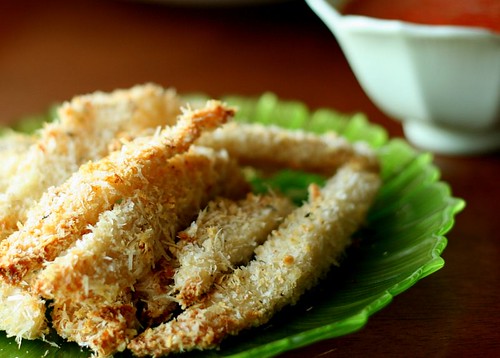
Fish Sticks, Re-Vamped

10.09.30-45

I've never been a fan of traditional "fish sticks" -- you know, the ones you pull out of the freezer and throw in the oven? Even as a kid I ate them reluctantly, and slathered in ketchup.

I wanted to make fish one night and tried to think of a way to prepare it so my picky 3-year-old would eat it. (My younger one has no problem with fish, or any kind of meat for that matter.) Sophie tends to like things in stick-form, so fish sticks were the answer.

I had to make sure they had a lot of flavor because tilapia, if not properly seasoned, can be very bland. On the up side, it absorbs whatever flavors you put on it and it's a versatile, clean slate to work with. I minced up a bunch of fresh garlic and added it to a beaten egg and a splash of buttermilk. Then I grated some fresh Parmesan cheese and added it to some flaky panko bread crumbs. After breading the sticks and baking them in the oven for a few minutes, we dipped them in warm marinara sauce.

There wasn't a single stick left. I've made these multiple times and get the same result -- happily eating children with no table-side negotiating. I love those nights!

P.S. Mom & Dad liked them, too. :)

10.09.30-50

Parmesan-Garlic Tilapia Sticks
by Natalie

1 lb tilapia or any other firm, white fish such as cod
1 egg
1/4 cup buttermilk
3 cloves garlic, pressed
1 1/2 cups panko bread crumbs
1/3 cup finely grated Parmesan or Romano cheese
A couple big pinches of salt and pepper
Marinara sauce for dipping

Preheat oven to 425 degrees F. Cut fish into 1/2-inch strips and sprinkle a little salt on both sides.

In a small shallow bowl whisk together the egg, buttermilk and pressed garlic. In another shallow bowl combine the bread crumbs, cheese, and a big pinch of salt and pepper.

Dip the fish sticks into the wet mixture, letting excess liquid drip off, then coat in bread crumb mixture. Lay on a baking sheet and repeat with remaining fish sticks. Bake for 10-12 minutes or until fish flakes easily with a fork. If you want them golden brown, broil them for the last minute of baking time.

Serve with warm marinara sauce.

Makes 3-4 servings.

Print Recipe Text Only

Thursday, September 30, 2010

Easy Homemade Chicken Stock + Other Pantry Staples


I like to make things from scratch. A lot. There are benefits and drawbacks to doing this, though. The good thing is that you know exactly what goes into what you're making, it (usually) tastes better and costs less than its store-bought counterpart, and (for me at least), it's fun to see ingredients come together in something that you wouldn't think of making at home.

The drawbacks? Once you fall in love with something that you make from scratch it's awfully hard to go back to the store-bought version. Yes, it obviously takes more time, and it's especially aggravating when you run out of multiple things at the same time. That happens to me a lot.

Recently I've been making chicken stock from scratch and have loved the results! It's a great way to get more out of leftover chicken bones (especially whole chickens which I've fallen in love with this past year). And the "recipe" I added below is simply a set of guidelines to get you started. As long as you've got an onion, a couple of carrots, and some celery you're set. Fresh herbs are a nice addition, too, but if you're buying fresh herbs for the sole purpose of making stock, then homemade stock may not be a cheaper option. It'll definitely taste better and have considerably less sodium, though. If you've got an herb garden or know friends who have herbs, it'll save you a lot of money.

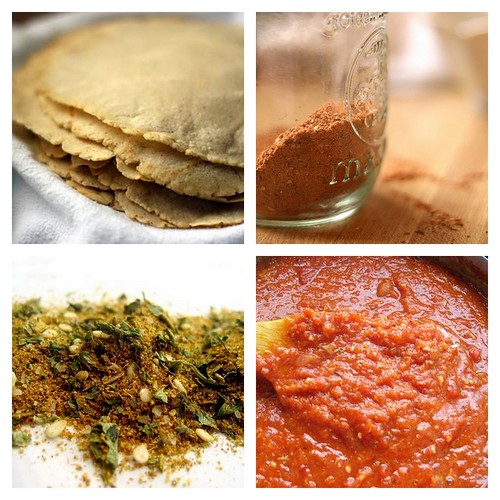
I've added a few other recipes for pantry staples that I've tried so far and most of them I keep on hand all the time.

Because I love ya.

PANCAKE MIXES
Buckwheat Pancake Mix
Regular Pancake Mix - This one helped wean me off of Bisquick. You can sub whole wheat flour to suit your tastes.

SPICE BLENDS
Pumpkin Pie Spice
Curry Powder
Paula Deen's House Seasoning
Taco Seasoning
Middle Eastern Spice Blend
Sweet Potato Fry Sprinkle

SWEET STUFF
Homemade Magic Shell Topping - Yes, you heard me.
Semi-Sweet Hot Fudge
Strawberry Sauce

OTHER STUFF
Squash/Pumpkin Puree
Croutons/Breadcrumbs - There aren't instructions for bread crumbs on this post, but if you make the croutons, then throw them in the food processor you'll probably end up with dried, seasoned bread crumbs.
Sun-Dried Tomatoes without the Sun
Roasted Garlic Pasta Sauce - I always have 2-cup portions of these in the freezer. It's great for both pasta and pizza.

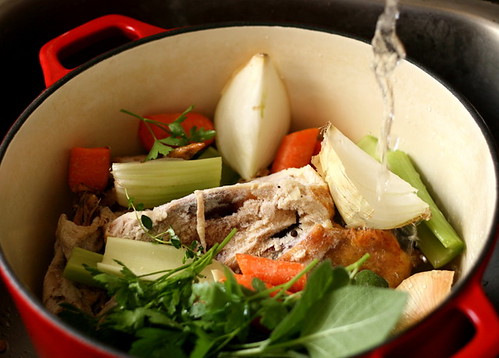
10.07.15-14

Easy Homemade Chicken Stock
by Natalie

1 meaty carcass from a 2-4 pound chicken (probably doesn't weigh that much anymore)
1 onion, quartered
2-3 stalks of celery, cut into large pieces
2-3 carrots, cut into large pieces
a large handful of fresh herbs (I like thyme, sage, parsley, and rosemary)
about 10 whole black peppercorns
2 bay leaves
2 peeled garlic cloves (optional)
1 leek, white parts only (optional)

Place all ingredients into a very large stockpot and fill with water up to an inch or two from the top of the pot. Bring to boil. Reduce heat and simmer on low for 4-6 hours.

Remove from heat and strain. I usually fish the big pieces out with a ladel, discard them, then pour the rest of the liquid through a fine-mesh strainer into a 4 qt bowl. Let it cool to room temperature, then cover and chill thoroughly (like overnight). Skim fat from the top of the bowl, then transfer broth to containers for storage. It'll keep in the fridge for about a week. You can use mason jars, large empty yogurt containers or freezer-safe zipper bags for storage in the freezer.

Makes around 4 quarts, depending on the size of your pot. I always use a 7 qt pot and come out with 4 quarts of stock.

Nat's Notes:
1. One variation I've seen is roasting all of the vegetables (and the chicken neck) before they go into the pot. I've never tried this, but I imagine it gives the stock a richer flavor. You wouldn't have to simmer the stock as long, either, probably only an hour or two.

Print Recipe Text Only

Thursday, September 23, 2010

27 Quick, Easy Meals for Busy Moms

I've been working hard on this big-mama post because I think it's something that will benefit a lot of tired, overworked moms (or dads, or anyone who is exhausted around 5PM and has no desire to cook dinner.) Actually it was Alyssa's last post/plea that finally pushed me over the edge.

I started digging around in the depths of my blog and pulled out 27 recipes that could reasonably be prepared in 30 minutes or less and don't require any complicated techniques or a lot of chopping. A little chopping, yes, but that's the trade off we make when we choose to eat real food instead of pulling some pre-packaged thing out of the freezer and into the microwave/oven. Like with most things, the more you chop, the faster you get. (And please use a sharp knife!) Your body will thank you.

So yes, these meals take longer than the 12 minutes it may take to cook a frozen pizza. A little prep work ahead of time or even better, menu planning (!), will make these even easier than they already are. I promise. I plan on doing a post in the near future focusing on slow cooker and freezer-friendly meals, but these are ones you don't have to think about (if you've planned ahead and have everything you need) until about 5PM.

Enjoy!

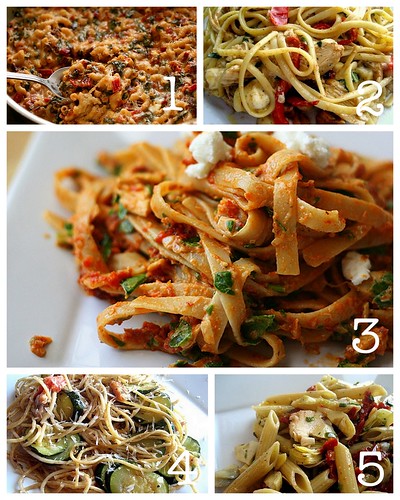
Pasta

pics from blog2-2

1.  Swiss Chard and Sun-Dried Tomato Skillet Mac - Comes together quickly if you have the sun-dried tomato pesto already made. A great way to incorporate greens if you have picky eaters!
2. Balsamic Chicken Pasta with Fresh Cheese - Dressed with a balsamic dressing instead of sauce to make it extra light and fresh.
3. Creamy Sun-Dried Tomato Fettucine - Another great one that uses the sun-dried tomato pesto!
4. Sausage and Zucchini Pasta Toss - A great one that gets much of its flavor from cooked sausage (like Aidell's).
5. Penne with Chicken and Sun-Dried Tomatoes - Heh. I didn't realize most of these recipes had sun-dried tomatoes! Feel free to substitute regular tomatoes in this one. I love the artichoke hearts in this.

 Rice

pics from blog3-1

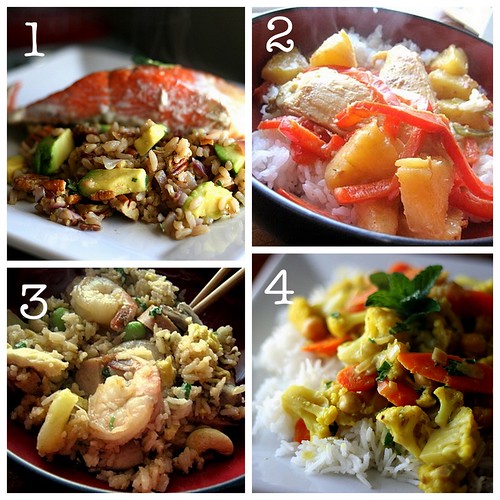
1. Foil-Packet Salmon and Nutty Lemon-Herb Brown Rice with Avocado - This is a delicious Omega-3 packed meal that my toddlers even enjoyed!
2. Pineapple Chicken - A delicious stir-fry dish with chunks of juicy pineapple and a coconut milk sauce.
3. Eight Treasure Fried Rice - This is probably the most interesting (in a good way) and delicious fried rice I've had. It's hearty enough to stand on its own, too.
4. Coconut Curry with Cauliflower, Carrots, and Chickpeas - A great vegetarian week-night meal with an optional lesson on the letter "C".


Gluten-Free/Alternative Grains

pics from blog4-1

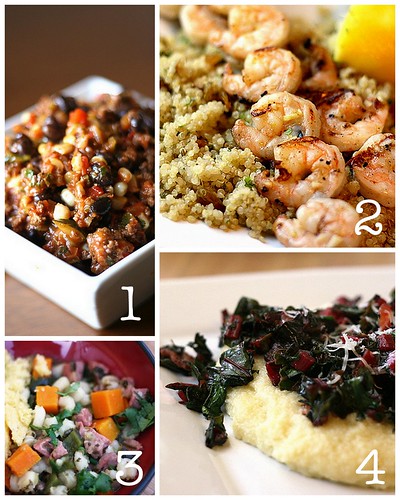
1. Hidden Veggie Chipotle Taco Meat - You can use this as a taco or burrito filling or over a bed of salad greens. A food processor makes this come together in a snap.
2. Grilled Garlic Shrimp and Quinoa with Garlic, Nuts, and Raisins - Quinoa is a great protein-rich grain that cooks up like rice. This one is for the garlic lovers!
3. Spicy Turkey Chile Verde with Hominy and Squash - Having the squash pre-chopped really saves a lot of time here. We loved this with a side of cornbread or muffins.
4. Smoky Greens over Polenta - Polenta (or grits) can be whipped up in no time. I love the combination of bacon and greens here.

(P.S. All of the gluten-free recipes on my site are indicated by a "*" in the recipe index!)


Burgers and the Like

pics from blog6-1

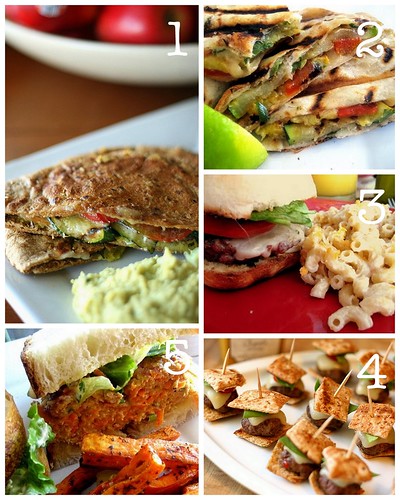
1. Grilled Zucchini and Ham Pita Panini with Basil Hummus - Hummus keeps in the fridge for about a week, so it's a good thing to do ahead of time.
2. Chimichurri Burgers - These burgers may look ordinary, but they're filled with a spicy cilantro/parsley chimichurri (kind of like pesto). One of our favorite burgers ever.
3. Thai Peanut Turkey Burgers - A different twist on a burger that's surprisingly delicious! Ground turkey is mixed with a blend of spices, shredded carrot and dab of peanut butter.
4. Itty Bitty Burgers - These may seem fussy, but they come together quickly, and it's something the kids would love to help with!

 
Soup
pics from blog5

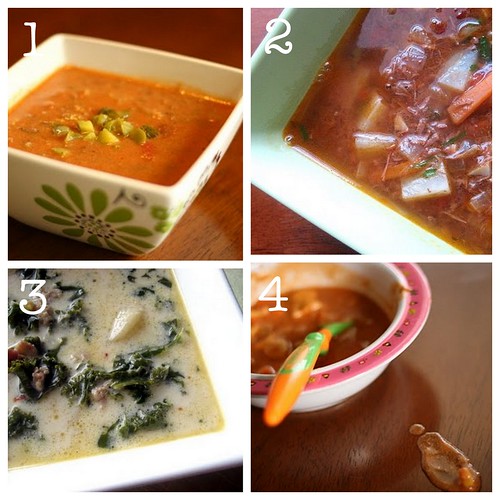
1. Hearty Cheeseburger Soup - A warming soup that tastes like a burger and fries! Nobody that's tried this hasn't liked it. (Or at least admitted it to me!)
2. Chipotle Steak and Potato Soup - Most likely my favorite beef soup ever. Make a batch of shredded chipotle beef in your slow cooker and save some leftovers to make this soup!
3. Zuppa Toscana - This is my version of the creamy Olive Garden soup, filled with sausage, potatoes, and kale.
4. Cheesy Tomato-Vegetable Soup - This is a common lunch-time soup that my kids love, but it would be wonderful on a weeknight for the whole family. It's done in about 15 minutes. Seriously.


Main Dish Salads
pics from blog7

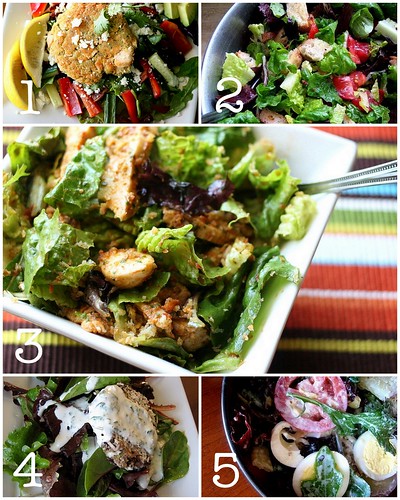
1. Creole Salmon Patties over Greens - Great use for leftover salmon or any other type of fish!
2. BLT Salad with Dijon Vinaigrette - One of my favorite salads - which may or may not be due to the fact that it's got bacon.
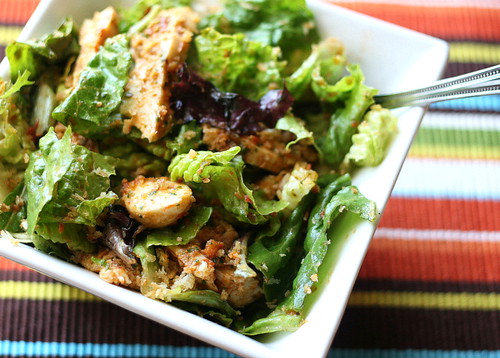
3. Chicken Parmesan Salad - The famous Chicken Parmesan turned into a light, flavorful salad. You won't miss the puddle of grease.
4. Black Bean Cake Salad with Cilantro-Lime Cream - The cilantro-lime cream in this is really what makes the whole thing shine. It's a great vegetarian option as well!
5. Green Bean and Egg Salad with Goat Cheese Dressing - Green salad meets potato salad meets egg salad. Kind of strange-sounding combination, but the dressing pulls it all together.

More posts that might make your culinary life a bit easier:

Thursday, September 16, 2010

Chicken Parmesan Masquerading as Salad

In the July/August issue of Food Network magazine, they had a section where they took popular dishes and turned them into salads. What a great way to get the flavor of an indulgent dish without the guilt and heartburn. Brilliant! 

The one that caught my eye first was the Chicken-Parmesan-turned-salad -- pieces of juicy grilled chicken & chunks of mozzarella on a bed of salad greens with a drizzle of tomato-ey vinaigrette (similar to this sun-dried tomato vinaigrette) and a sprinkle of flaky Parmesan bread crumbs.

Yep, I think that includes all the components of Chicken Parm. 

Except the puddle of grease left on the plate. But I think we'll live.

10.07.15-11

Chicken Parmesan Salad
from Food Network Magazine, July/August 2010

1 plum tomato, halved
4 sun-dried tomatoes packed in oil, plus 2 tablespoons oil from the jar
2 tablespoons red wine vinegar
1 clove garlic
1/2 teaspoon dried oregano
1 bunch fresh basil, torn
1/3 cup grated Parmesan
Kosher salt and freshly ground pepper
2 skinless, boneless chicken breasts (about 1 pound)
3 tablespoons extra-virgin olive oil
1 cup panko breadcrumbs
2 tablespoons chopped fresh parsley
8 cups Italian-blend salad greens or baby arugula
8 ounces bocconcini (small mozzarella balls), quartered

Preheat a grill to high. Puree the plum tomato, sun-dried tomatoes, vinegar, garlic, oregano, a few basil leaves and 2 tablespoons parmesan in a blender, drizzling in the sun-dried tomato oil until smooth. Add 2 to 3 tablespoons water, if needed; season with salt and pepper.

Halve the chicken breasts horizontally to make four 1/4-inch-thick cutlets. Brush with 1 tablespoon olive oil and season with salt and pepper. Grill the chicken until marked on the bottom, about 4 minutes, then turn and grill until cooked through, about 3 more minutes. Transfer to a cutting board.

Heat the remaining 2 tablespoons olive oil in a large skillet over medium-high heat. Add the breadcrumbs, season with salt and pepper and cook, stirring occasionally, until golden, about 2 minutes. Add the remaining 3 tablespoons plus 1 teaspoon parmesan and the parsley and cook until toasted, about 1 more minute.

Toss the salad greens and remaining basil in a large bowl. Cut the chicken into pieces and add to the greens along with the mozzarella. Toss with the dressing, then sprinkle with the breadcrumb mixture.

Nat's Notes:
1. Panko bread crumbs are flakier than normal bread crumbs and are usually found in the Asian section of the grocery store.

Print Recipe Text Only

Originally posted on Perrys' Plate

Thursday, September 9, 2010

Itty Bitty Burgers

10.08.31-25

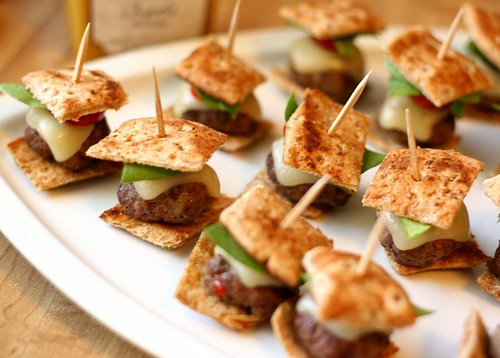
Aren't these little burgers darling? They almost look like they're chatting with each other. 

They look really fussy, but they're actually quite easy. Start to finish, they only took about 30 minutes to prepare. Make sure you make the patties really small, about 1.5 inches across. After a little shrinkage from being cooked, they should be about the perfect size.

10.08.31-8

Having the fixings prepped before the patties come out of the oven is really helpful. One concern I had about these was keeping them warm, and that's one reason why I opted for fresh spinach instead of lettuce. If you pop them back in the oven for a minute or two to heat up, the spinach won't turn to slime like lettuce would.

If I were to do this again, I would smear some mustard on the buns, too. The chipotle mustard I used has a bit of a kick, and I thought having it in the meat would be enough. It was perfect for my little girls, but the hubs and I would have liked a little more heat. Besides that, we loved them alongside some Sweet Potato Fries for dinner!

10.08.31-10

As I was making these, the wheels in my head started turning. An Italian version would be awesome, using some basil or sun-dried tomato pesto in the meat and topping them with mozzarella or provolone cheese, and a piece of roasted red pepper. Wouldn't it be fun to have a "Burger Tasting" party where everyone brought a different kind to share? The possibilities make my head spin...

10.08.31-17

Chipotle Mustard Itty Bitty Burgers
by Natalie

1/2 lb lean ground beef
2 T chipotle mustard + extra to spread (any kind of mustard will do)
a generous pinch of salt
2 hamburger buns
2 slices pepper jack cheese, cut into 1-inch pieces
a handful of cherry or grape tomatoes, sliced thinly
a handful of fresh baby spinach (or lettuce) cut into 1-inch pieces
16 toothpicks

Preheat oven to 400 degrees.

In a medium bowl add 2 T of chipotle mustard and a generous pinch of salt to the ground beef. Using your hands, mix gently until everything is thoroughly combined. Roll meat into very small balls, roughly 1 1/2 inches across and set on a rimmed cookie sheet. (I got 16 out of my batch.) Press each ball down gently to slightly flatten . Bake for 10 minutes, remove and lay a small piece of cheese over each burger. Return to oven for 1-2 more minutes until cheese is melted and burgers are cooked through.

While the burgers are cooking, spread mustard on buns (if you like), and cut into 1-inch pieces. Prepare remaining ingredients and have everything ready when the burgers come out of the oven. Assemble burgers on toothpicks by stabbing some bread (mustard side down), then lettuce, then tomato, then a burger, then the other piece of bread (mustard side up). When you put them on a serving dish, press everything down a bit -- that will help them stand up.

Makes 16 appetizers (serving about 8), or dinner for 4 people.

Print Recipe Text Only

Originally posted on Perrys' Plate

Thursday, September 2, 2010

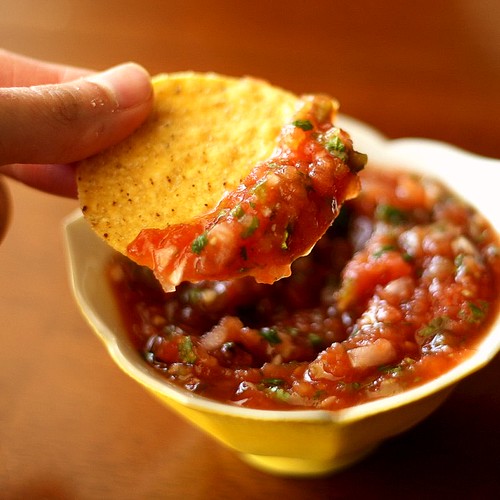
Chevy's Fresh Salsa + 7 Ways to Use Up Tomatoes

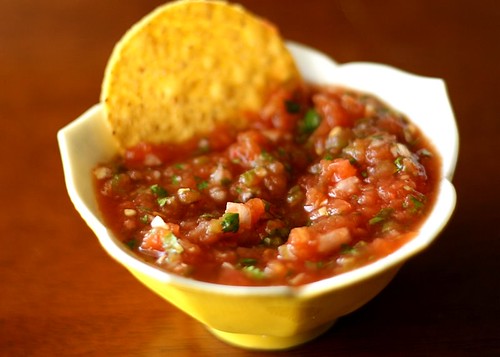
10.08.25-13

By far, the most popular recipe on my site (via Google searches) is for Chevy's Fresh Salsa. Followed by Cafe Rio Chicken, Chevy's Sweet Corn Tomalito, and Applebee's Fiesta Lime Chicken (speaking of bad photos. Yikes.) All excellent recipes, if you're looking for restaurant copycats.

I hadn't made this salsa since I originally posted it over a year ago, and since I have a giant tub of (not so) freshly picked ripe tomatoes, I thought I'd give it another go and update the photos.

Man, I forgot how much I loved this salsa.

Instead of simply updating the old post (found here), I decided to revise the recipe a bit. A while ago I noticed that someone had re-posted the recipe and said something to the effect of the salsa being created from Satan himself. (It was hot. But he liked it.) I didn't remember it burning my face off. I don't have a high threshold for heat, either.

Anyway, I doubled the recipe while reducing the number of jalapenos and the amount of liquid smoke. This recipe should fit nicely in a quart-sized mason jar. Unless you add all of the extra liquid from the tomatoes.

See exhibit A:

10.08.25-3

This go-round I grilled the vegetables at night, then stuck them in the fridge and finished the salsa the next morning. When I pulled the bowl out of the fridge, there was a considerable amount of liquid in the bottom. I decided to leave it out for a thicker salsa (which thickened even more after sitting in the fridge). If you want a looser salsa, then reserve it and add it to achieve the consistency you want.

Oh yeah. If you're swimming in tomatoes (like me), here are a few more ways to get rid of a lot of tomatoes:

Sun-Dried Tomatoes Without the Sun
Fresh Pico de Gallo
Vegetarian Tortilla Soup
Roasted Garlic Pasta Sauce
Tyler Florence's Roasted Tomato Soup
Rigatoni with Eggplant (and Tomato) Puree
BLT Salad with Dijon Vinaigrette

10.08.25-7

Chevy's Fresh Salsa, Revised
adapted from Top Secret Restaurant Recipes 2 by Todd Wilbur

2 1/2 pounds tomatoes
3 large jalapenos (use more if small, fewer if large)
1/4 med Spanish onion (or yellow)
3 cloves garlic
1/4 c chopped fresh cilantro
1/4 c white vinegar
2 tsp salt
1 tsp liquid mesquite smoke

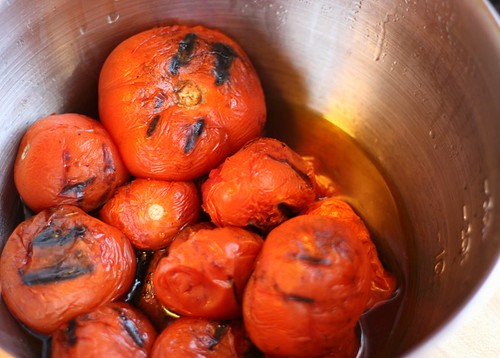
Preheat BBQ (or stovetop grill pan like I used) on high. Remove stems from tomatoes, then rub some oil over each. Leave stems on jalapenos and rub oil on them, too.

Place tomatoes on grill when it's hot. After about 10 minutes, add all jalapenos. In about 10 minutes, turn the tomatoes and peppers. When almost all of the surface of the peppers are black, remove them from the grill. The tomatoes will turn partially black, but when the skin begins to come off they are done. Remove from grill and allow veggies to cool.

Remove skin from tomatoes and place in a food processor. Pinch the stem end from each pepper, remove any skin that has burned, and place into food processor with tomatoes.

Add remaining ingredients and puree on high for 5-10 seconds. Chill for several hours or overnight before serving. Makes about 2 cups.

Nat's Notes:
1. After scraping all of the seeds and some of the whitish veins from the peppers, it was still quite spicy -- about like "medium" salsa you'd buy at the store.
2. After the tomatoes have cooled, you'll notice quite a bit of liquid left in the bowl (especially if you let them sit overnight). Adding it all back into the salsa makes it sort of watery (see picture on original post). I didn't add any back into it this time around and I liked the thicker texture. It also thickens as it sits in the fridge, so hold on to that liquid in case you want to thin it out later.


Print Recipe Text Only

Re-posted from Perrys' Plate

Thursday, August 26, 2010

Grilled Zucchini and Ham Pita Panini with Basil Hummus + 10 More Zucchini Recipes!

I think I was a bit spoiled as a child -- at least when it came to meals. Not only did my mom make us whatever we wanted (within reason) for breakfast and lunch, we got to pick how it was cooked. She must have loved me a lot to make me hot dogs for breakfast, per my request, and even cut up the meat before it went into the bun. (Also per my request. I was a strange child.) And her sandwiches were the best. I don't think I ever ate a tuna sandwich unless it was grilled. I believe it was because of those that I have a slight aversion to cold sandwiches. If I have access to a stove, or at the very least, a microwave, there will be no cold sandwiches for this girl.
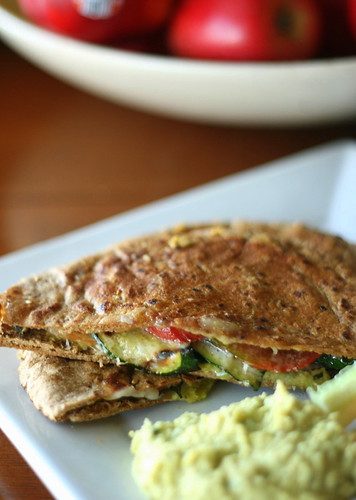
IMG_6581

I find it ironic my love for hot sandwiches has not caused me to buy a panini maker. In fact, even if I had the space for one, I don't think I'd get one. I think a heavy cast-iron skillet placed on top of the sandwich while it cooks basically does the same thing. Except make those cool lines on the bread.

I whipped up these pita paninis and some hummus for dinner one night last week. Steve has been putting in a lot of late nights at the clinic, trying to finish school, so dinner has been a bit lax. I even quit planning a menu! Ack! I've decided that I need to use more of what I have on hand, so I've been cooking more on the fly lately. Fun sometimes, but a little stressful at others when I'm at a loss for what to make and my kids are poking each other in the eyes.

We LOVED these sandwiches. I liked grilling (aka in a skillet with butter, not an actual grill, but that would be good, too) pita bread because they crisped up really well. Especially the whole wheat ones I got at Trader Joe's. They're extra thin and sometimes a little too fragile, but I love them anyway.

Luckily I had one lone zucchini left in my fridge to save the day. I decided to do another zucchini recipe round up in case they're spilling out of your garden. Or appearing on your doorstep. Or are ridiculously cheap at the store.

It wasn't until I compiled this list that I realized just how much I love grilled zucchini. Seriously. I think I only prepare zucchini two ways -- grilled or grated up.

Grilled Zucchini Salad with Tomatoes and Purslane
Grilled Vegetable Pizza
Marinated Zucchini
Festive Grilled Zucchini and Sweet Potato Salad
Grilled Veggie Quesadillas
Roasted Vegetable and White Bean Dip
Grilled Zucchini Lasagna
Zucchini Cakes
Stuffed Zucchini with Ground Turkey
Zucchini Cupcakes with Caramel Frosting
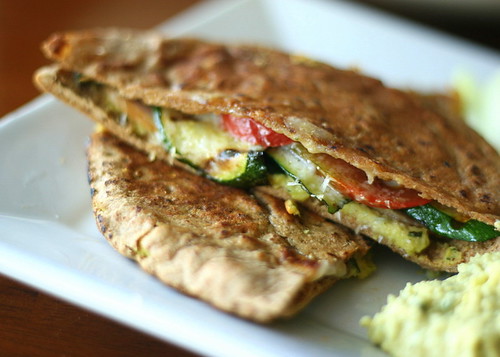
IMG_6584

Grilled Zucchini and Ham Pita Panini with Basil Hummus
by Natalie

1 small zucchini, sliced diagonally into 1/4-inch slices
oil, for brushing
2 whole pitas sliced in half
4 slices thin-sliced deli ham
2 round slices of provolone cheese, cut in half
1 medium tomato, sliced into 1/4-inch rounds
6-10 fresh basil leaves
about 1/2 cup Basil Hummus (recipe below)

Heat BBQ grill or stove-top grill pan to medium-high heat. Toss zucchini slices in a bowl with a glug of oil. Place slices on pre-heated grill and cook for 8-10 minutes, flipping once, until nice grill marks have formed on both sides and zucchini is tender. Remove and set aside.

Coat a medium skillet with butter or nonstick spray and place over medium heat.

To assemble pitas, spread a couple spoonfuls of hummus inside each pita half and fill with one slice of ham, a few pieces of grilled zucchini, a slice of tomato, a few basil leaves, and a slice of cheese. Place pita half in the preheated skillet, then cook in a panini press.

If you don't have a panini press (like me), place a heavy, cast-iron skillet on top of the pita. Cook for 3-5 minutes or so, flip pita over, and place the heavy skillet on top again and cook for another 3-5 minutes until everything is heated through and outsides of the pita are golden brown and crisp. If you don't have a cast-iron skillet, simply use a small skillet and put a couple of cans of beans (or whatever else you have on hand) in the skillet to weigh it down.

Serve with Basil Hummus and sliced carrots, cucumbers, or other crudites.

Makes 4 pita halves.

Basil Hummus
adapted from this recipe by David Lawrence

2 cans of chickpeas (garbanzo beans) drained and well-rinsed
2 T tahini (ground sesame paste, found in ethnic or health food aisles)
2 cloves of garlic, peeled and chopped coarsely
juice from 1 lemon (about 1/4 cup)
1 cup loosely packed fresh basil leaves (about 1/2 bunch)
big pinch of salt and ground black pepper
dash of cayenne pepper (optional)
1/3 cup extra-virgin olive oil

Combine chickpeas, tahini, garlic, lemon juice, basil, salt, cayenne and about 1/4 cup water in the bowl of a food processor. While the food processor is running, drizzle in the olive oil. Process until smooth, adding more oil if necessary. Check seasoning and add more salt if necessary.

Will keep refrigerated in an airtight container for two weeks.

Makes about 2 1/2 cups (seriously an estimate out of my head . . . my food processor only holds 3 cups and it almost fills it)

Print Recipe Text Only 

Originally posted on Perrys' Plate

Thursday, August 19, 2010

Hidden Veggie Chipotle Taco Meat

You're probably thinking, "Taco meat? Whoop-dee-do, Nat. I make taco meat every Tuesday."

I love taco meat, but it isn't anything new. It isn't glamorous. Or photogenic for that matter. So why did I bother posting this? (Not that everything I post is glamorous and photogenic. Oh, heavens no.)

Because taco meat is where I hide vegetables most successfully from my picky little girls.

Right now is the perfect time of year to do it, too, with all of the fresh produce practically spilling out into the streets. A food processor comes in handy at times like these. I zipped up a whole zucchini and a red bell pepper in about 20 seconds before I tossed it in the pan. Grated carrots would also work really well. I threw in some frozen corn and beans (because my girls like them and it makes the meat stretch a bit further) that really stand out, in hopes it would distract them from the little green and red specks. Works every time.

I do love using traditional taco seasoning, but sometimes I feel like changing things up. The use of tomato sauce, chipotle powder, and diced green chiles was a nice change, I think. The chipotle powder adds a subtle kick (just a bit of tongue tingle) that my toddlers were OK with.

10.08.16-26

Hidden Veggie Chipotle Taco Meat
by Natalie

1 pound ground beef (grass-fed and organic, if possible)
1 red bell pepper, minced
1 small zucchini, minced
2 T dried minced onion (or 1/2 cup fresh chopped onion)
8 oz tomato sauce
1/4-1/2 tsp. chipotle chile powder or 1-2 chopped (seeds removed) chipotles in adobo sauce (to taste)
1 4-oz can diced green chiles
1/2 tsp salt
1/4 tsp coarsely ground black pepper
1 15-oz can black beans, drained and rinsed
1 cup frozen corn
1/2 cup chopped fresh cilantro

Brown ground beef in a large skillet over medium-high heat. Meanwhile, prepare vegetables (food processor is really nice for this). When the beef is almost cooked through, add the minced pepper and zucchini. Cook for 3-4 more minutes until some of the liquid cooks out and the beef is cooked through.

Add diced onion, tomato sauce, chipotle powder, diced green chiles, salt, pepper, beans, corn, and 1/2 cup water. Cook another 4-5 minutes until about half of the liquid has cooked out and mixture is nice and saucy. Stir in cilantro and keep warm until ready to serve.

Nat's notes:
1. You can substitute 1 T chili powder for chipotle powder if you don't have it or worry about it being too spicy.
2. You can substitute any number of vegetables for the bell pepper and zucchini, as long as they're minced very small. I used what I had on hand. Cauliflower, yellow squash, fresh spinach, grated carrots, cabbage, or even broccoli would work nicely. You would need about 2 cups of minced vegetables, total.
3. Frozen peas would sub well for the frozen corn.

Serving suggestions (basically what you would do with regular taco meat)

Taco Salads: Place a handful of lettuce in a bowl, top with taco meat, chopped tomatoes, a few corn chips, sour cream, and cotija (or feta) crumbles.

Nachos: Put a few handfuls of corn chips on a rimmed baking sheet and top with about half of the taco meat. Top with shredded cheese (ohh, pepper jack would be good) and bake at 400 degrees F for 10-12 minutes. Serve with sour cream, guacamole, and other nacho toppings.

Quesadillas: Put a few spoonfuls of taco meat on one side of a tortilla. Top with a few sprinkles of shredded cheese, then fold in half. Cook in a skillet over medium heat until cheese is melted and tortilla is browned and crisp.

Burritos/Tacos: Place some taco meat, cheese, and whatever else you like in a large (or small) tortilla. Roll and serve

Southwest Baked Potatoes: Spoon some taco meat into a baked potato that's been cut open. Top with cheese and/or sour cream.

You could also serve the taco meat over rice or over a warm piece of cornbread.

Print Recipe Text Only 

Originally posted from Perrys' Plate.

Thursday, August 12, 2010

Ooey-gooey Cinnamon Rolls

IMG_6259

I've tried a lot of cinnamon roll recipes in my years of baking and occasionally find a new "favorite". Well, people, this one just rose to the top and clobbered the rest with its gooey, sticky goodness. According to Pioneer Woman (and I completely agree), the problem with most cinnamon rolls is that there's too much bread and not enough goo. People fight over the center of the roll, but with these, there' no need for that because . . .

THE WHOLE THING TASTES LIKE THE MIDDLE.

If you don't like gooey, sticky cinnamon rolls, then you would absolutely hate these. For the rest of you, . . . at least try them once in your life. Life-changing? Absolutely.

By the way, this recipe makes about 50. I did the whole thing back in January and filled two rimmed cookie sheets. This last time I halved the recipe and made them in those little disposable foil baking pans and froze them. Pre-frozen or fresh, they turn out amazing. And I love that you can just make the dough and stick it in the fridge for a couple of days until you find a few minutes to finish them.

IMG_6251

Pioneer Woman's Cinnamon Rolls
from The Pioneer Woman's Cookbook (and blog)

1 quart whole milk
1 cup vegetable oil (I used canola)
1 cup sugar
2 packages active dry yeast (I used instant yeast that I store in the freezer)
9 cups all-purpose flour
1 teaspoon (heaping) baking powder
1 teaspoon (scant) baking soda
1 tablespoon (heaping) salt
plenty of melted butter
2 cups sugar
Generous sprinkling of cinnamon

for the maple frosting:
1 bag powdered sugar
2 teaspoons maple flavoring
1/2 cup milk
1/4 cup melted butter
1/4 cup brewed coffee
1/8 teaspoon salt

Mix the milk, vegetable oil and sugar in a pan. “Scald” the mixture (heat until just before the boiling point). Turn off heat and leave to cool 45 minutes to 1 hour. When the mixture is lukewarm to warm, but NOT hot, sprinkle in both packages of Active Dry Yeast. Let this sit for a minute. Then add 8 cups of all-purpose flour. Stir mixture together. Cover and let rise for at least an hour.

After rising for at least an hour, add 1 more cup of flour, the baking powder, baking soda and salt. Stir mixture together. (At this point, you could cover the dough and put it in the fridge until you need it – overnight or even a day or two, if necessary. Just keep your eye on it and if it starts to overflow out of the pan, just punch it down).

When ready to prepare rolls: Sprinkle rolling surface generously with flour. Take half the dough and form a rough rectangle. Then roll the dough thin, maintaining a general rectangular shape. Drizzle 1/2 to 1 cup melted butter over the dough. Now sprinkle 1 cup of sugar over the butter followed by a generous sprinkling of cinnamon.

Now, starting at the opposite end, begin rolling the dough in a neat line toward you. Keep the roll relatively tight as you go. Next, pinch the seam of the roll to seal it.

Spread 1 tablespoon of melted butter in a seven inch round foil cake or pie pan. Then begin cutting the rolls approximately ¾ to 1 inch thick and laying them in the buttered pans. (At this point you can cover them and put them in the freezer. When you're ready to make them, just pull them out and stick them on the counter for a few hours until they thaw and rise, which happened quicker than I though.)

Repeat this process with the other half of the dough. Let the rolls rise for 20 to 30 minutes, then bake at 375 until light golden brown, about 15 to 18 minutes.

For the frosting, mix together all ingredients listed and stir well until smooth. It should be thick but pourable. Taste and adjust as needed. Generously drizzle over the warm rolls. Go crazy and don’t skimp on the frosting.

Makes about 50 rolls. 

Nat's Notes:
1. I don't drink coffee, so I substituted 4 oz of cream cheese for the coffee, then added a couple more tablespoons of milk to thin it out. I kid you not, this frosting taste just like the maple frosting on the doughnuts at the grocery store. 

Print Recipe Text Only 

Adapted from this Perrys' Plate post.

Thursday, August 5, 2010

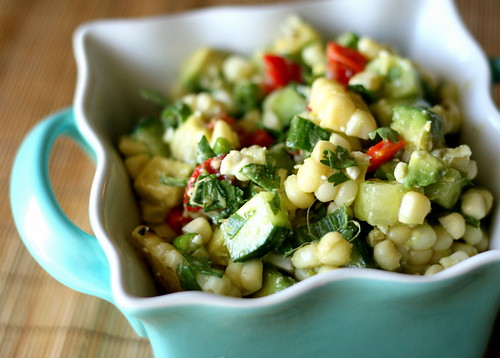
Grilled Corn Salad with Cucumber, Avocado, & Feta

I'm a sucker for fresh corn in the summer. My all-time favorite way of making fresh corn is turning it into Elote, or Mexican corn on the cob. But when I don't feel like getting my face covered in cheese and sauce, this flavorful, fresh bowl of happiness hits the spot.

I have two other recipes for similar corn salad/salsa type dishes on my blog. (This one and this one.) I think the one below has an edge on the other two with the addition of cucumber and avocado and could stand alone much better as a salad. (But would also be fantastic over grilled chicken or fish.) I used what I had on hand (one of those clean-out-the-produce-drawer situations), but you could substitute just about anything. In fact, I almost named this one, "Grilled Corn and Whatever Salad," but that sounded a little apathetic. I really do love this combination.

IMG_6240


Grilled Corn Salad with Cucumber, Avocado, & Feta
by Natalie

4 ears of corn, grilled 
1/2 of an English cucumber, diced
1/2 of an avocado, diced
3 jarred roasted red peppers, diced (about 1/3 cup)
1/4 cup chopped cilantro
2 green onions, sliced thinly
1/2 cup feta cheese crumbles
3 T extra-virgin olive oil
juice from 1 lime
1 clove garlic, minced
couple pinches of cumin
salt and pepper to taste

Remove kernels from corn cobs and place in a medium bowl. Add the rest of the ingredients and mix well. That's it.

Nat's Notes:
1. You can certainly boil the cobs or warm up some frozen corn in a skillet with a bit of oil.

Thursday, July 29, 2010

Southwest Cod Cakes


I'm excited for this recipe because it comes from a newly-found bloggy friend of mine, Lauren from GoLo Kitchen! I met Lauren through Tasty Kitchen and found we had lots in common. (Including a friend who lives down the street from me, whom I'll talk about shortly.) Lauren and I thought it would be fun to do a recipe swap. 

I chose Lauren's Southwest Cod Cakes, which turned out to be delicious! I've started to incorporate more fish into our diet. (Even though I'm not traditionally a fish person. If you can find good quality fish, i.e. wild-caught, it can be a great source of Omega-3's.) Cod is one fish that I think of as rather bland (unless battered, fried, and thrown into fish tacos), and I was curious about making "cakes" from it. Due to a few mistakes of my own doing (see recipe notes), half of my "cakes" fell apart during cooking, but they were still full of flavor -- especially paired with my favorite black beans and pico (with an avocado thrown in). 

My husband thought the cod cakes would be great thrown into a taco, too. So I guess cod is destined to be a taco filling in our household. I'm cool with that.

www.PerrysPlate.com

Southwest Cod Cakes

2 Tablespoons butter
1/2 cup onion, diced
1 clove garlic
1/2 cup red bell pepper, finely diced
2 1/2 lbs. cod filet, cooked and flaked
1/4 cups cilantro, chopped
1 Tablespoon cumin
1/2 Tablespoon chili powder
salt
pepper
2 eggs
1/4 cup breadcrumbs

Heat large skillet to medium heat. Melt butter and sauté onions, garlic, and red pepper until soft, 7-10 minutes. Remove from heat and set aside. In large bowl, combine remaining ingredients and cooked vegetables together. Form palm-sized patties by pressing mixture in between hands. Place on greased cookie sheet. Bake at 350 for 20 minutes. Serve with rice, black beans and/or avocado tomato salsa.

Makes 12 cakes.

Nat's Notes:
1. I used half the amount of cod, one egg, the full amount of onion and peppers and adjusted the seasonings accordingly. I held back on the cumin and chili powder, not wanting to overpower the flavor of the fish (I used about 1 tsp cumin and 1/2 tsp chili powder).
2. I made the mistake of using fresh bread crumbs (I didn't have dried and I was too lazy to toast the ones I made from sticking bread into my food processor) and half of them fell apart during cooking . . .
3. Which brings me to my last note. I marinated the cod for about 15 minutes in a mixture of olive oil, lime juice, cilantro, cumin, salt and pepper, then put it in a foil packet and grilled it for 10-12 minutes. Then when I cooked the patties, I fried them in a little coconut oil instead of baking them. Lauren mentioned that they were a tad bit dry and I think changing the cooking methods helped a little, as well as serving them with salsa and beans.


Originally Posted HERE

Thursday, July 22, 2010

Grilled Whole Wheat Calzones

The last time I was grilling pizza, I thought, "hmm. . . I wonder if calzones would work on a grill?"

Yep. They do. They turned out amazing, actually. Like a homemade hot pocket. I was afraid the crust would be too thin, but it held everything in and cooked up nicely.

I used my trusty cast-iron grill pan to make these, and I assume it would be fine on a regular grill, too. I really need to get an outdoor grill so I can test my grill pan recipes on it. Oh yea, I need a backyard first. And a house to go with that. Someday . . .

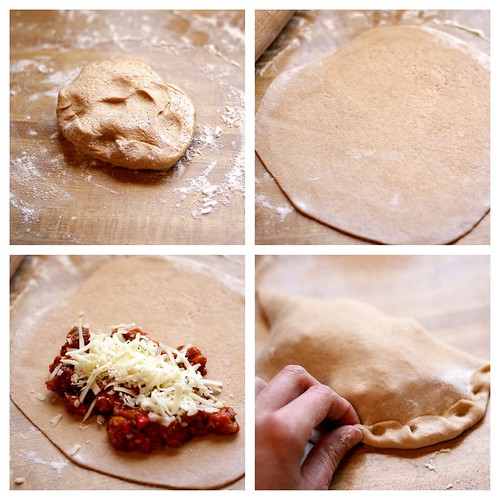
So, here's how it went down:

06 - June3

Pretty straightforward. I used my go-to (mostly) wheat pizza crust recipe, but I think any recipe would work. If you don't want to grill them you can bake them in the oven. Or even freeze them after you put them together and throw them into the oven later in the week. I did that. I realized I was going to have eight of these things, so I froze four. They turn out beautifully whether you grill them or bake them!

10.06.25-28


Grilled Whole Wheat Calzones
by Natalie

1 recipe whole wheat pizza crust (or your favorite recipe, about 1 lb of dough)
1 lb uncooked Italian turkey sausage, remove from its casings
2 small zucchini, grated and squeezed to remove excess moisture
1/2 red bell pepper, diced finely
1 tsp Italian seasoning or 1-2 T minced fresh herbs (basil, oregano, thyme, etc.)
2 cups pizza or marinara sauce (I like this sauce.)
2 cups shredded mozzarella cheese

Crumble sausage into a large skillet over medium-high heat. Cook, stirring and breaking up the sausage, until cooked through. Remove from the pan and set aside. Add a little oil to the pan, if needed, then add grated zucchini and diced bell pepper. Cook until soft, about 3-5 minutes. Add herbs and pizza sauce to skillet and simmer for 4-5 minutes. Add sausage back to the pan and simmer for another 4-5 minutes until much of the liquid has absorbed. The mixture should be fairly chunky (see photo in post). Let filling cool for 15-20 minutes.

Preheat grill to medium-high or oven to 425 degrees F.

Divide dough into 8 balls. On a floured surface, roll each ball out to a 7 or 8-inch circle. The dough should be pretty thin, about 1/8th of an inch. Place a couple of spoonfuls of mixture onto the bottom half of the dough, sprinkle with a bit of cheese, then fold the upper half over the bottom half. Seal the edges by folding the bottom edge over the top and pinching to seal. Transfer to a baking sheet and repeat with the rest of the dough balls.

If grilling, carefully transfer calzones to the hot grill and grill, covered, for about 15 minutes, turning once, until both sides have nice grill marks and the crust is somewhat crisp.

If baking, brush the calzones with a little olive oil and bake for 15-20 minutes or until they are as brown as you like them.

Makes 8 calzones.

Nat's Notes:
1. These freeze wonderfully! After I realized how many this would make (I wasn't sure in the beginning), I decided to freeze half of them for later. After assembling the calzones, place on a baking sheet and freeze them. Once they're frozen solid, you can transfer them to a plastic zip-top bag and store in the freezer. To cook, simply place them on a baking sheet, brush with oil and bake at 425 for about 25-30 minutes. I wouldn't recommend grilling them once they've been frozen.
2. You can use whatever filling you want for these. If you grill them, I'd recommend using pre-cooked filling and nothing that would release a lot of moisture (like raw vegetables) or they may get mushy.

Print Recipe Text Only

Originally posted HERE.