One of the things on my messy handwritten list, was "cupcake toppers". I browsed the assortment they had there, but nothing was satisfying enough to pick up and take to the checkout counter. I wondered if I had enough time to order some off of Etsy, but knew that they'd never make it here by August 17th. When I settled upon my not being able to find a decent pre packaged set of toothpick decorations, I finally said "I'll just make my own".
The phrase "I'll just make my own" can go one way or another. It can slide to the back of my to do list, and eventually fall over the edge into the pool of "I forgot", never to be seen or heard of again. Or, I'll actually do it. The pool of "I forgot" is pretty full right now, so I have to admit that when I said "I'll just make my own", I didn't think I actually would.
But, this time I actually did.
What you'll need:
-Scissors
-Glue
-Pencil
-Lollipop sticks (you can get these in the baking section at the craft store)
-Images for toppers (I found mine by doing a google image search)
-Card stock
-Tape
I was originally going to use toothpicks, but I wanted my toppers to be taller, rather than resting directly on the frosting.

First, cut out your images.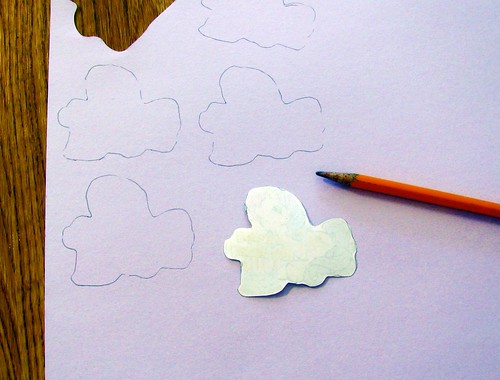
After all of your images are cut out and set aside, take one of your cutouts, flip it over, place it onto your card stock (I used a light purple color, to match the cupcake sleeves I'll be using for the cupcakes), and trace the outline. Do this once for every cupcake topper that you plan to make. You can use pencil instead of pen, so that you can erase your lines later. But if you're like me, then you really don't care what the backs of the toppers look like, and it doesn't matter, haha.
OK, now, its time to cut your card stock. Don't cut along the line that you just traced. Cut just outside of that line. You don't want your cutout image and your card stock to match up exactly, you'll want a little bit of extra room. After you've cut out all of your card stock backings, flip them over so the pencil side is face down on your work surface (I did it on the floor). Then, line the border of the backs of your image with glue, and set it in place on top of your card stock.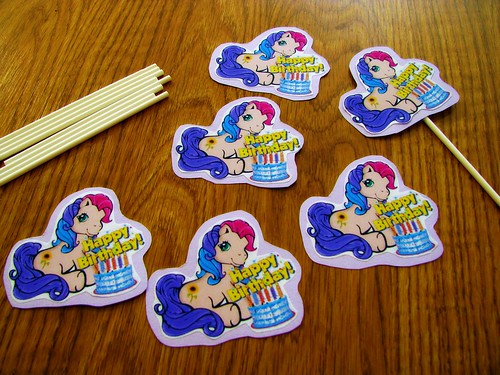
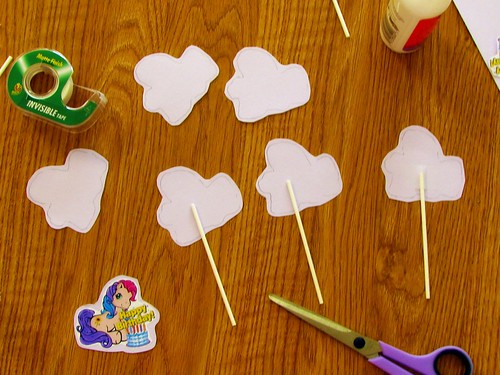
You're almost done. Now, get out your tape and your lollipop sticks. Flip over all of your freshly glued toppers so that the image is face down and the pencil tracings are face up. Set down your lollipop stick where you want it to be, and tape it into place.
And Voila!! Super cute cupcake toppers, that you made all by yourself :)
Miss Eleanore Sue is going to be mighty excited to have Rainbow Dash sitting pretty on all of her delicious gluten free birthday cupcakes, isn't she? I can't wait, hehe.
Love these! So cute!
ReplyDeletevery creative and very easy to make! Love it!
ReplyDelete